
Yes. This is clickbait. But I mean it!
I’ve spent weeks trying to configure ECS clusters, debugging Fargate, spinning up and debugging EKS cluster permissions, and even trying to deploy containers on EC2 instances and hopefully never will again!
Fortunately, AWS has an option that actually implements the full “serverless” ethos and doesn’t make me dig into as many of the dirty details as I’ve had to before: AWS App Runner. In this post I’ll show you how to throw together a simple AWS App Runner API that will help you get around any of the AWS Lambda limitations. I’ll do this with Node.js but you can easily use other languages.
Look, I know what you’re thinking - App Runner is old news! How have I only started using it now?
Well, up to this point I’ve fervently used AWS Lambda and the Serverless Framework for 75% of my application APIs. But recently I ran into a use case that went over the file size requirements of Lambda Function packages forcing me to rethink my architecture. So of course, I didn’t hesitate to look at AWS App Runner a “fully managed container application service” (they could and should have just called it serverless). As far as container services on AWS go this is actually the closest to serverless that they come.
What You Need to Getting Started
First things first, you’ll need to have a few accounts before you begin.
- An AWS Account
- A GitHub Account
While App Runner doesn’t require it, the AWS integration with GitHub is very smooth and that’s what I’ll be using to avoid the complexities of Docker Containers in ECR.
Preparing Our Application Code
The first thing you’ll need to do is create a new GitHub repository under your own GitHub account. We’ll use this to sync with AWS in order to build our application.
If you want to skip ahead, I’ve got a demo repository here on GitHub. I’d suggest making your own new repo without forking because forks sometimes behave differently than self-created repos. You can also clone the project locally, then change the GitHub remote to your own new GitHub repository and push your code there.
Here’s what’s in the repository:
.
├── README.md
├── package-lock.json
├── package.json
└── server.js
You can get virtually the same repository yourself from adding a server.js file with this in it:
import express from 'express'
import cors from 'cors'

const PORT = 8080
const HOST = '0.0.0.0'

var app = express()
app.use(express.json())
app.use(cors())

app.get('/', async (req, res) => {
  res.json({"serviceStatus": "we're live!"})
})

app.listen(PORT, HOST)
And then running this to get the required dependencies:
npm install --save express
npm install --save cors
Finally, you’ll need to edit your package.json file to include a start script:
{
  "name": "app-aws-runner-demo",
  "version": "1.0.0",
  "type": "module",
  "description": "AWS App Runner Example",
  "main": "server.js",
  "scripts": {
      "start": "node server.js"
  },
  "dependencies": {
      "cors": "^2.8.5",
      "express": "^4.16.1"
  }
}
From there, just make sure your changes are reflected in your GitHub repository before connecting it to AWS. Seriously, that’s it. That’s all the code I need to deploy the API on App Runner. I could also technically add a configuration file to make my code store more of the configuration for the service but only if we’re not in a rush.
Deploying Your Application with AWS App Runner
With our application code ready to go our next step is to log into AWS and navigate to the AWS App Runner service.
From here, we’ll have two options:
- Building and managing Docker containers yourself and storing them in AWS ECR. This is great if you’re already familiar with Docker and generally understand how to build containers and use ECR.
- Connect your source code repository and let AWS App Runner handle everything else for you and rebuild Docker images with every commit or through manual deployments
Now, I like to do things the lazy way. So I obviously choose option 2 so I can skip all the pesky docker build, docker push, docker tag-your-it commands. Who has time for those anyway?!
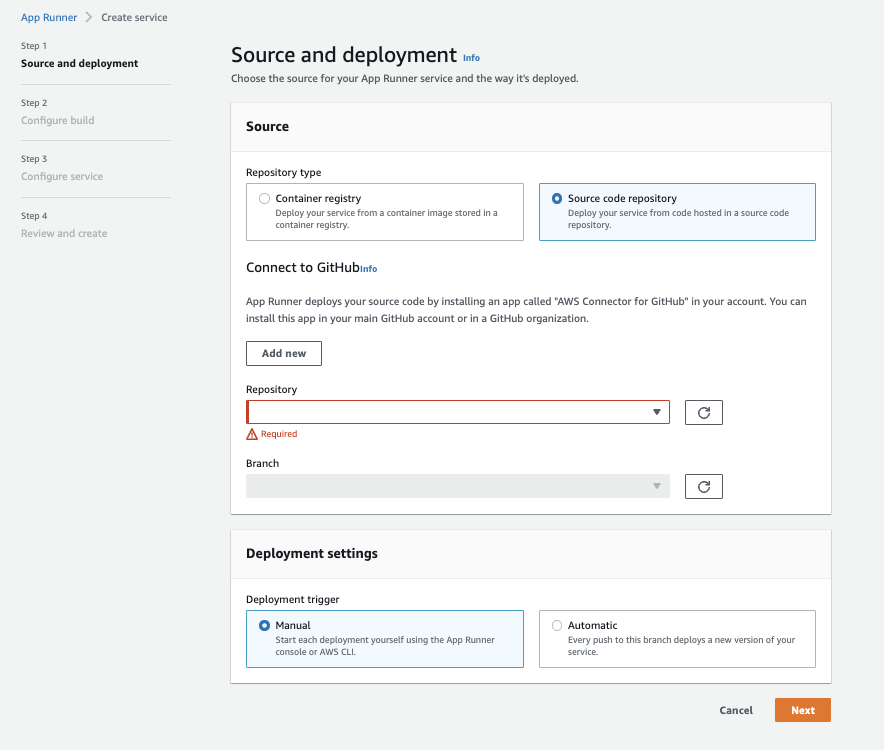
With the “Source code repository” selected we will also need to connect to our GitHub repository and install the AWS Integration with GitHub.
After this process is done and the branch is selected (main by default)
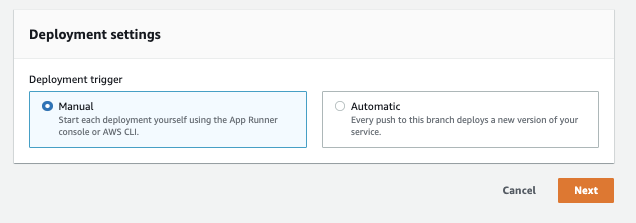
App Runner will require us to configure a Deployment setting. For our purposes, we’ll choose a “manual” deployment process which will allow us to deploy by clicking a deploy button later.
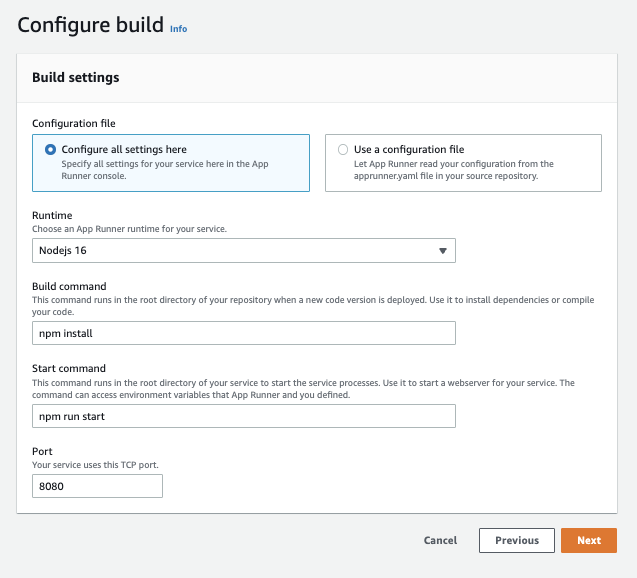
After clicking “Next” we’ll see the option to configure build settings for our application. By default, the Node.js application is configured to run on port 8080, which is also the default for the AWS App Runner.

We will also need to configure the Runtime language, version, build, and start commands for the application. In this case, we’re using Node.js 16. Our build command is npm install to install all the dependencies in package.json. Our start command we set earlier and is npm run start:
In the next screen we have to name our application and have options to configure everything from the CPU and Memory resources, scaling, health checks, and more.
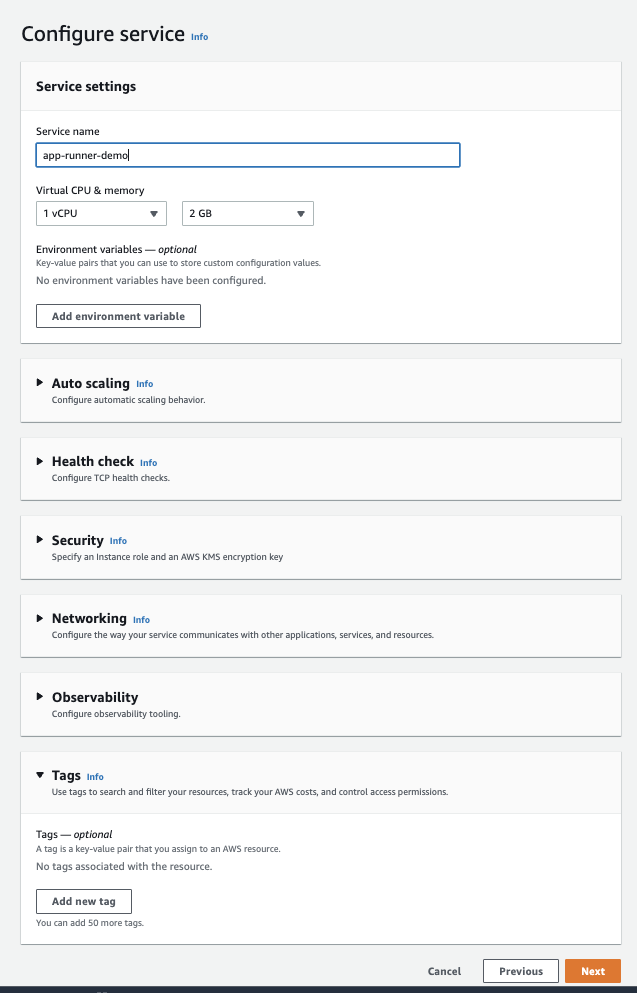
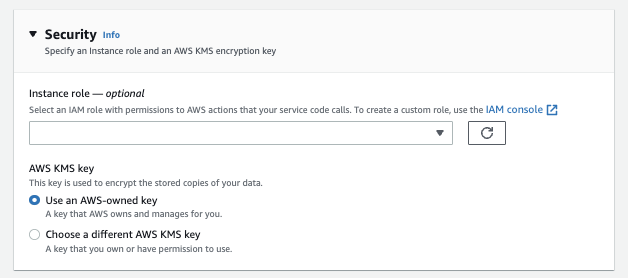
Importantly, if we modify the application to an AWS service we would need to update the “Security” section to include an IAM “Instance Role” with permissions to use various AWS services:
After that we can click next and deploy our application!
This process will take several minutes. This is because the AWS App Runner Service is doing everything else for us. This includes fetching our code, creating a new Docker Image, pushing it to AWS’s manged ECR and then deploying it to the managed AWS App Runner Service.
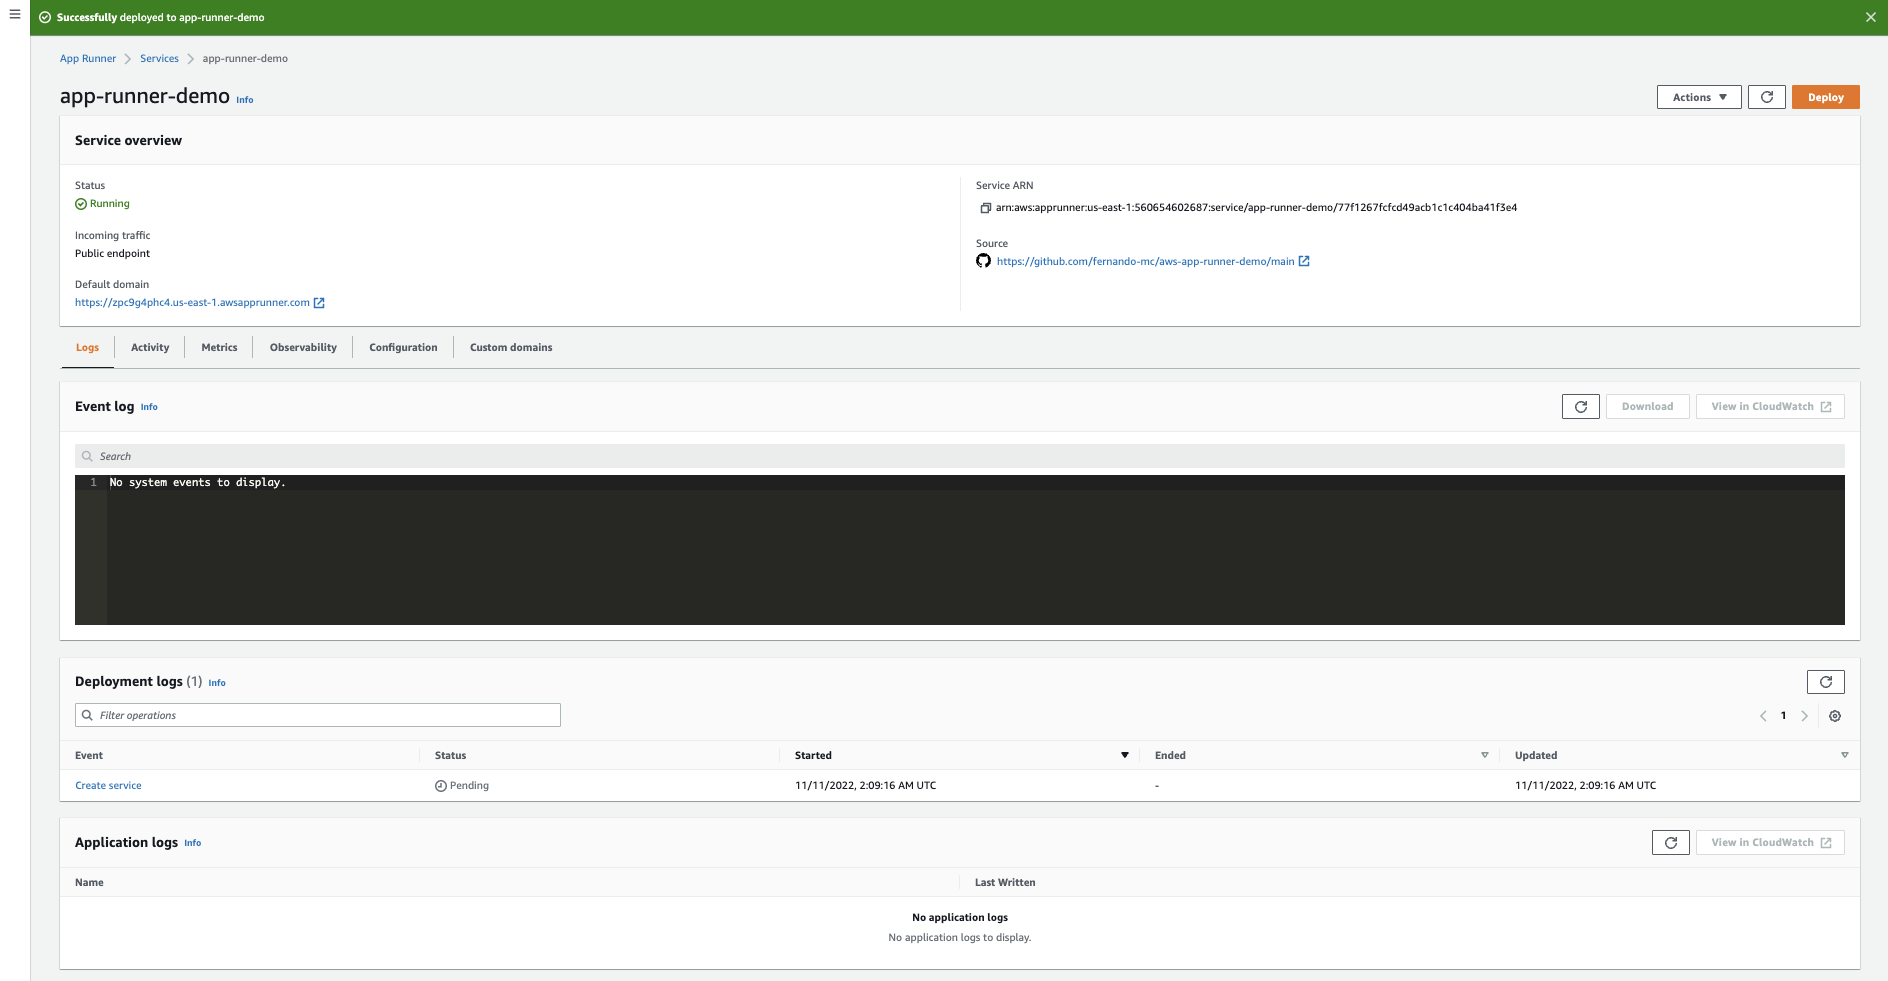
As the application finishes deploying you can review the status of deployment, the configured source and logs, and eventually click the “Default Domain” link as the deployment finishes.
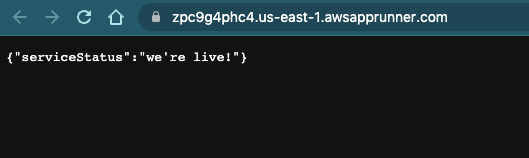
ANd that’s it! It’s that simple. We have a deployed containerized application running in AWS without even needing Docker installed on our local machines.
If we want to learn more about this process, we could also click on the Deployment Logs and review the full process of what happens when deploying an application like this:
11-10-2022 06:15:21 PM [AppRunner] Finished building your application source code.
11-10-2022 06:12:14 PM [Build] Successfully tagged application-image:latest
11-10-2022 06:12:14 PM [Build] Successfully built d799230a0517
11-10-2022 06:12:14 PM [Build]  ---> d799230a0517
11-10-2022 06:12:14 PM [Build] Removing intermediate container 3f11b3d5b267
11-10-2022 06:12:14 PM [Build]  ---> Running in 3f11b3d5b267
11-10-2022 06:12:14 PM [Build] Step 5/5 : EXPOSE 8080
[SKIPPED for brevity]
11-10-2022 06:12:14 PM [Build]  ---> Running in 5c3e134df057
11-10-2022 06:12:14 PM [Build] Step 4/5 : RUN npm install
11-10-2022 06:12:14 PM [Build]  ---> 7f31350dd610
11-10-2022 06:12:14 PM [Build] Removing intermediate container 1d853986ddfb
11-10-2022 06:12:14 PM [Build]  ---> Running in 1d853986ddfb
11-10-2022 06:12:14 PM [Build] Step 3/5 : WORKDIR /app
11-10-2022 06:12:14 PM [Build]  ---> e00a8c522c99
11-10-2022 06:12:14 PM [Build] Step 2/5 : COPY . /app
[SKIPPED for brevity]
11-10-2022 06:12:14 PM [Build] 16.17.1: Pulling from awsfusionruntime-nodejs16
11-10-2022 06:12:14 PM [Build] Step 1/5 : FROM 082388193175.dkr.ecr.us-east-1.amazonaws.com/awsfusionruntime-nodejs16:16.17.1
11-10-2022 06:12:14 PM [Build] Sending build context to Docker daemon  2.468MB
[SKIPPED for brevity]
11-10-2022 06:09:57 PM [AppRunner] Starting to build your application source code.
From here, you can make any changes you want to the application, push them to your GitHub repository and then manually click the “Deploy” button to redeploy.
Conclusions
And that’s it! Truly a marvelously short process to deploy a simple containerized app on AWS.
While the full build process is a bit slow for my taste to use AWS App Runner regularly I imagine that if you manage your own Docker container image deployment process there are probably ways to optimize the deployment times.